My brother’s glasses frames broke but he still had the lenses. I thought it would be a fun project to design and print new frames for him. Good excuse to learn more CAD, and how hard could it be?
Pretty hard, it turns out.
Getting the Lens Right
The first major challenge was getting accurate lens measurements. I placed the lens on a cutting mat and started trying to model around it, but the first few prototypes weren’t even close to fitting. I was just iterating over and over, wasting plastic, and guessing at dimensions.
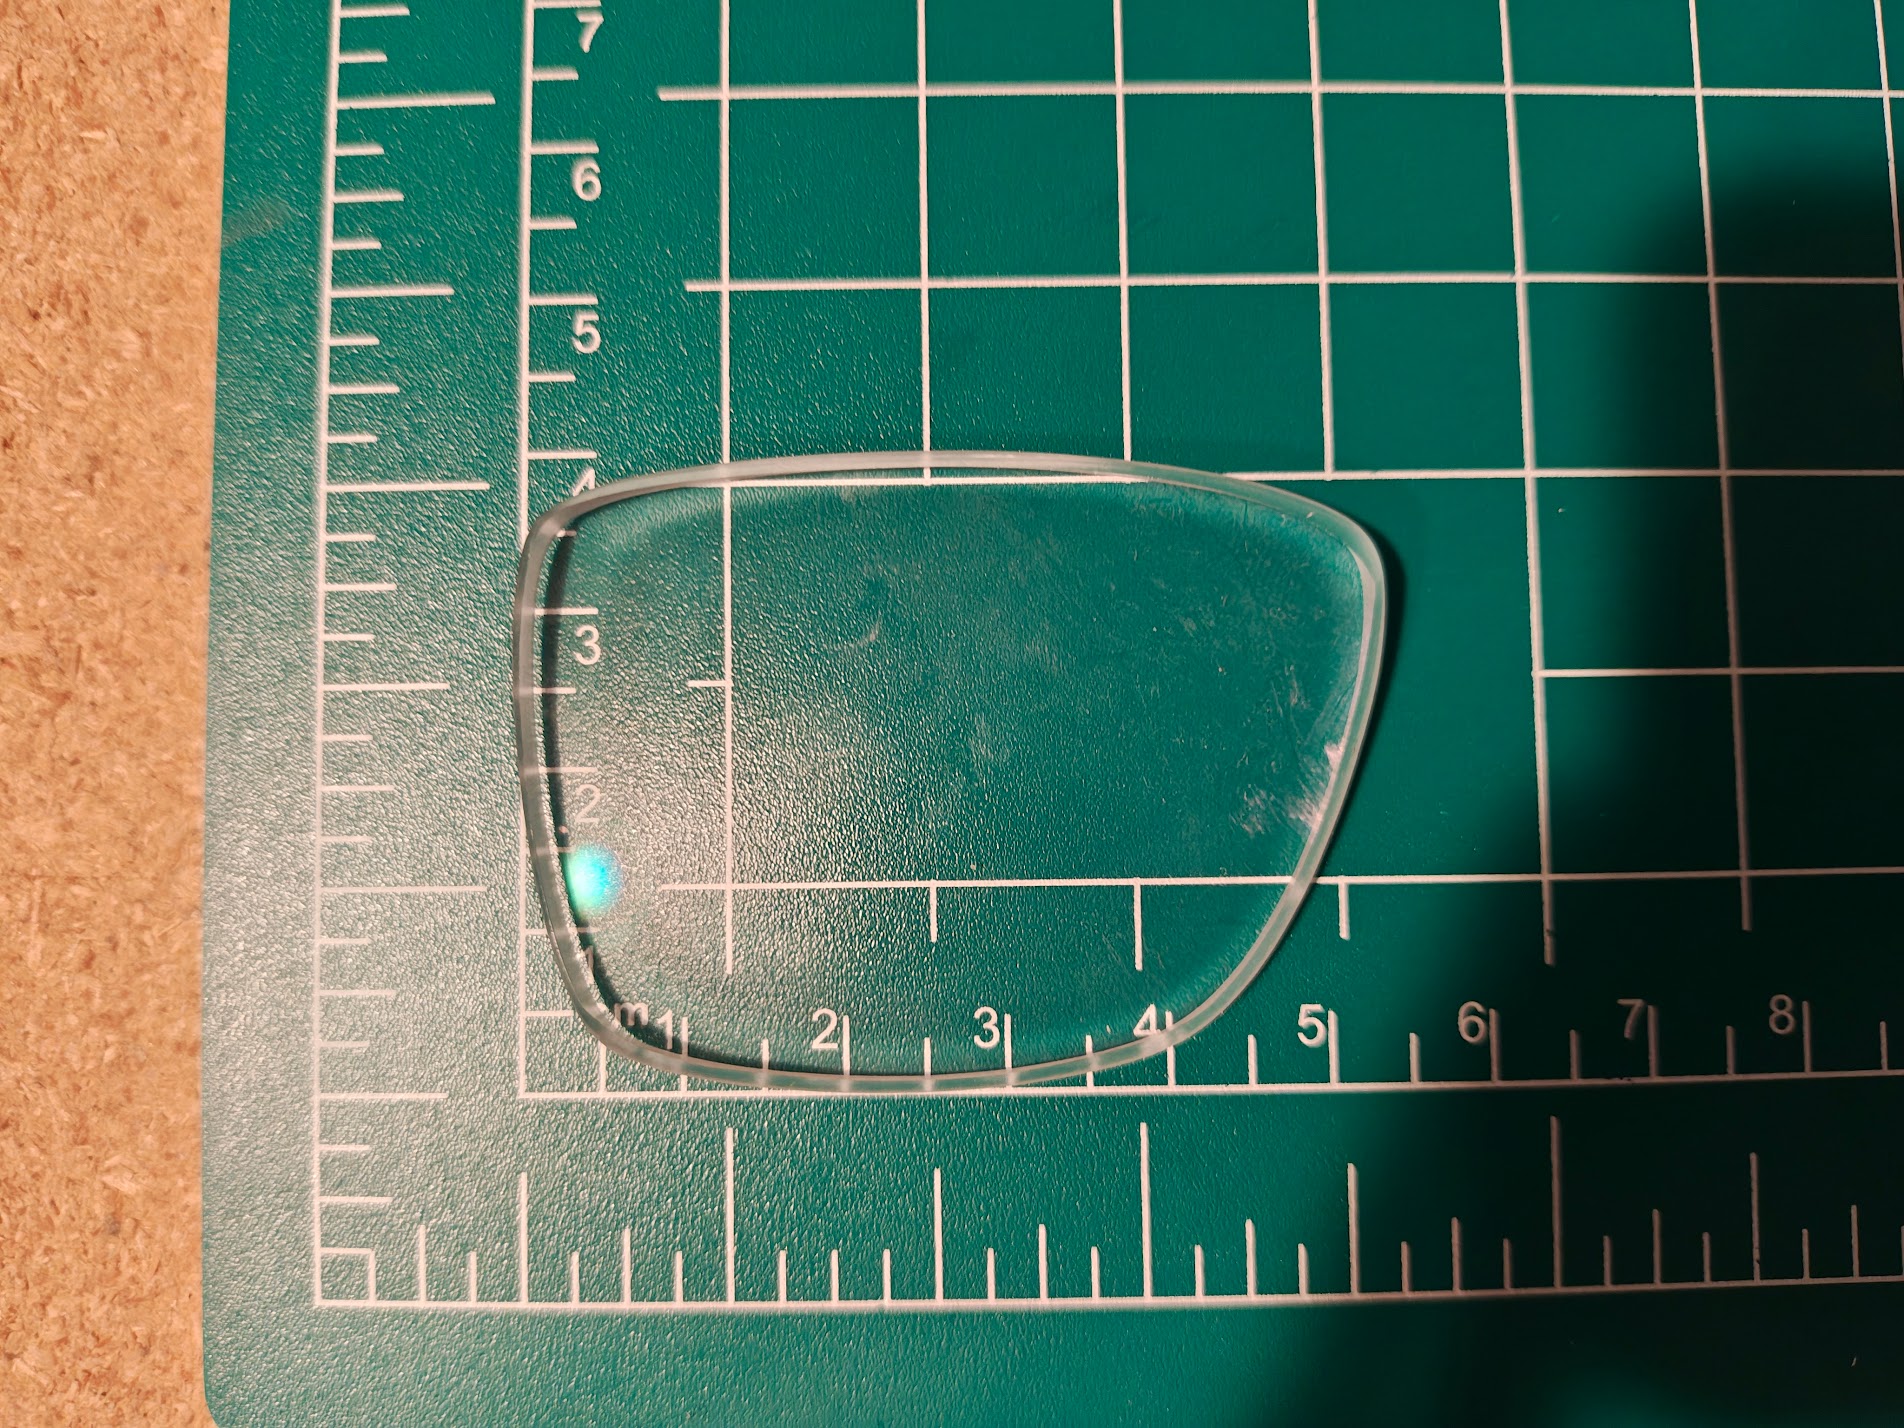 Prescription lens on the cutting mat
There had to be a better way. So I built a camera rig out of small aluminum extrusion to hold my phone and take accurate top-down photos. I imported the photo into Onshape and used the cutting mat grid to set the scale. From there I could trace the lens outline directly in the CAD model. Better images helped immensely. After that I got a prototype frame that actually fit the lens.
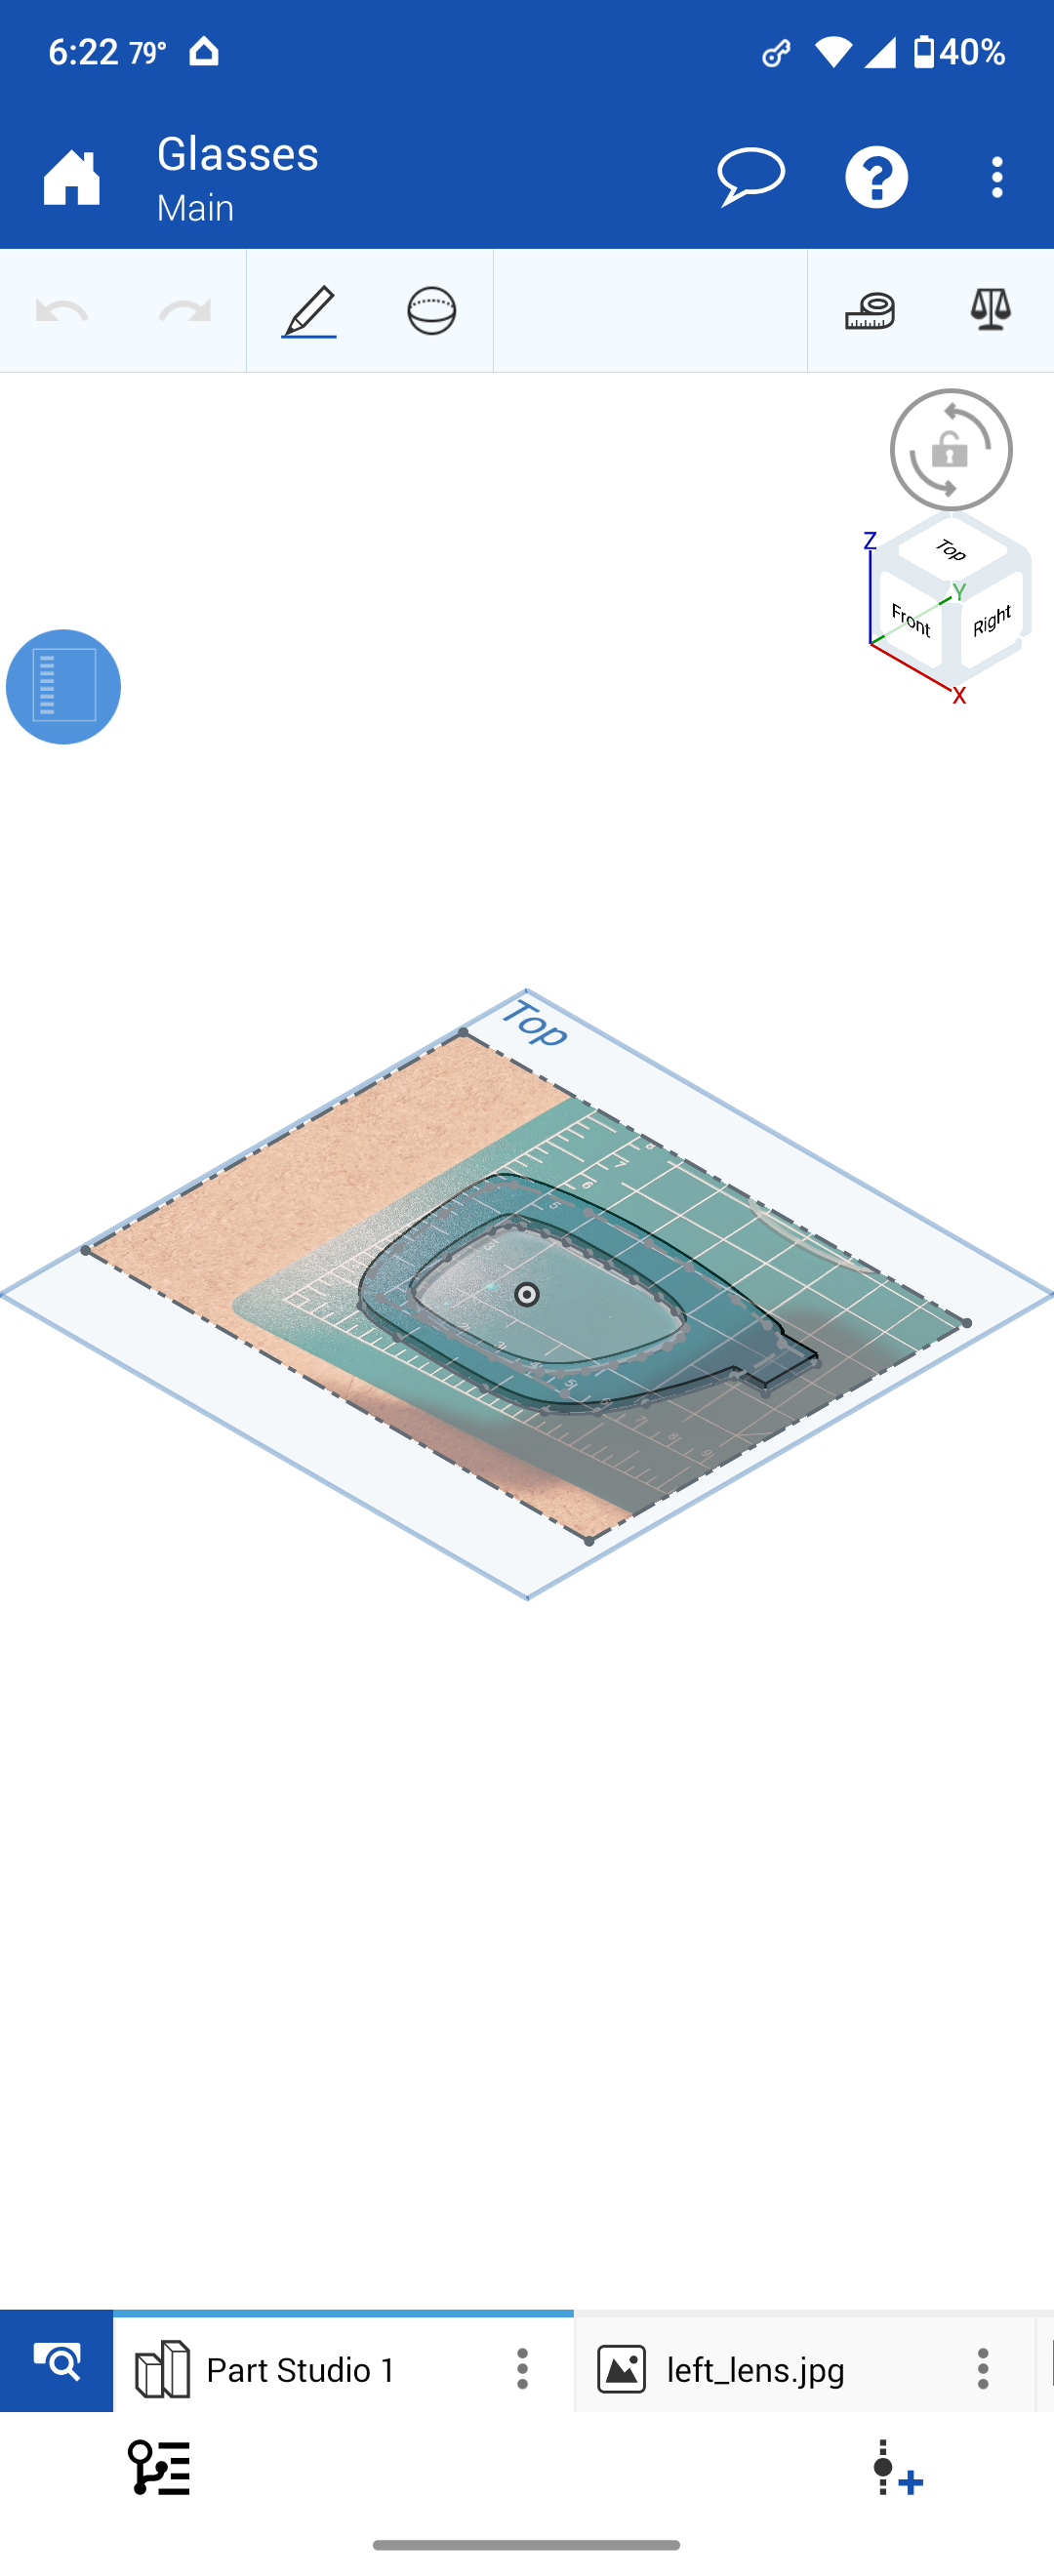 Tracing the lens outline in Onshape using the photo as a reference
 CAD model overlaid on the lens photo to check fit
Design
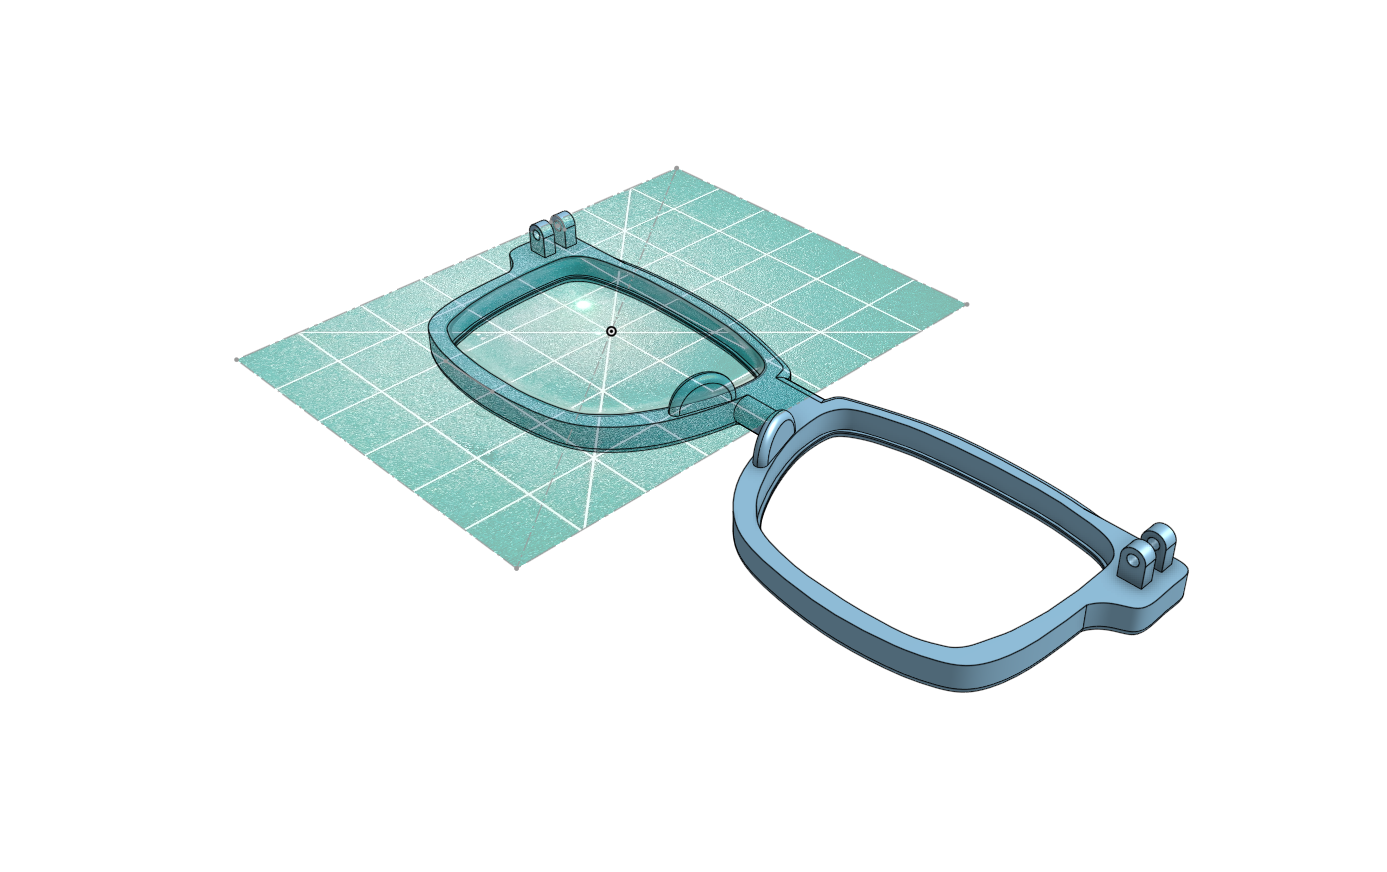
The frames got better as I got better at CAD. The first full frame prototype had stationary temple arms, printed as one piece. As I improved, I was able to design the frames and arms as separate parts and assemble them after printing.
 Front frame design with hinge points for the temple arms
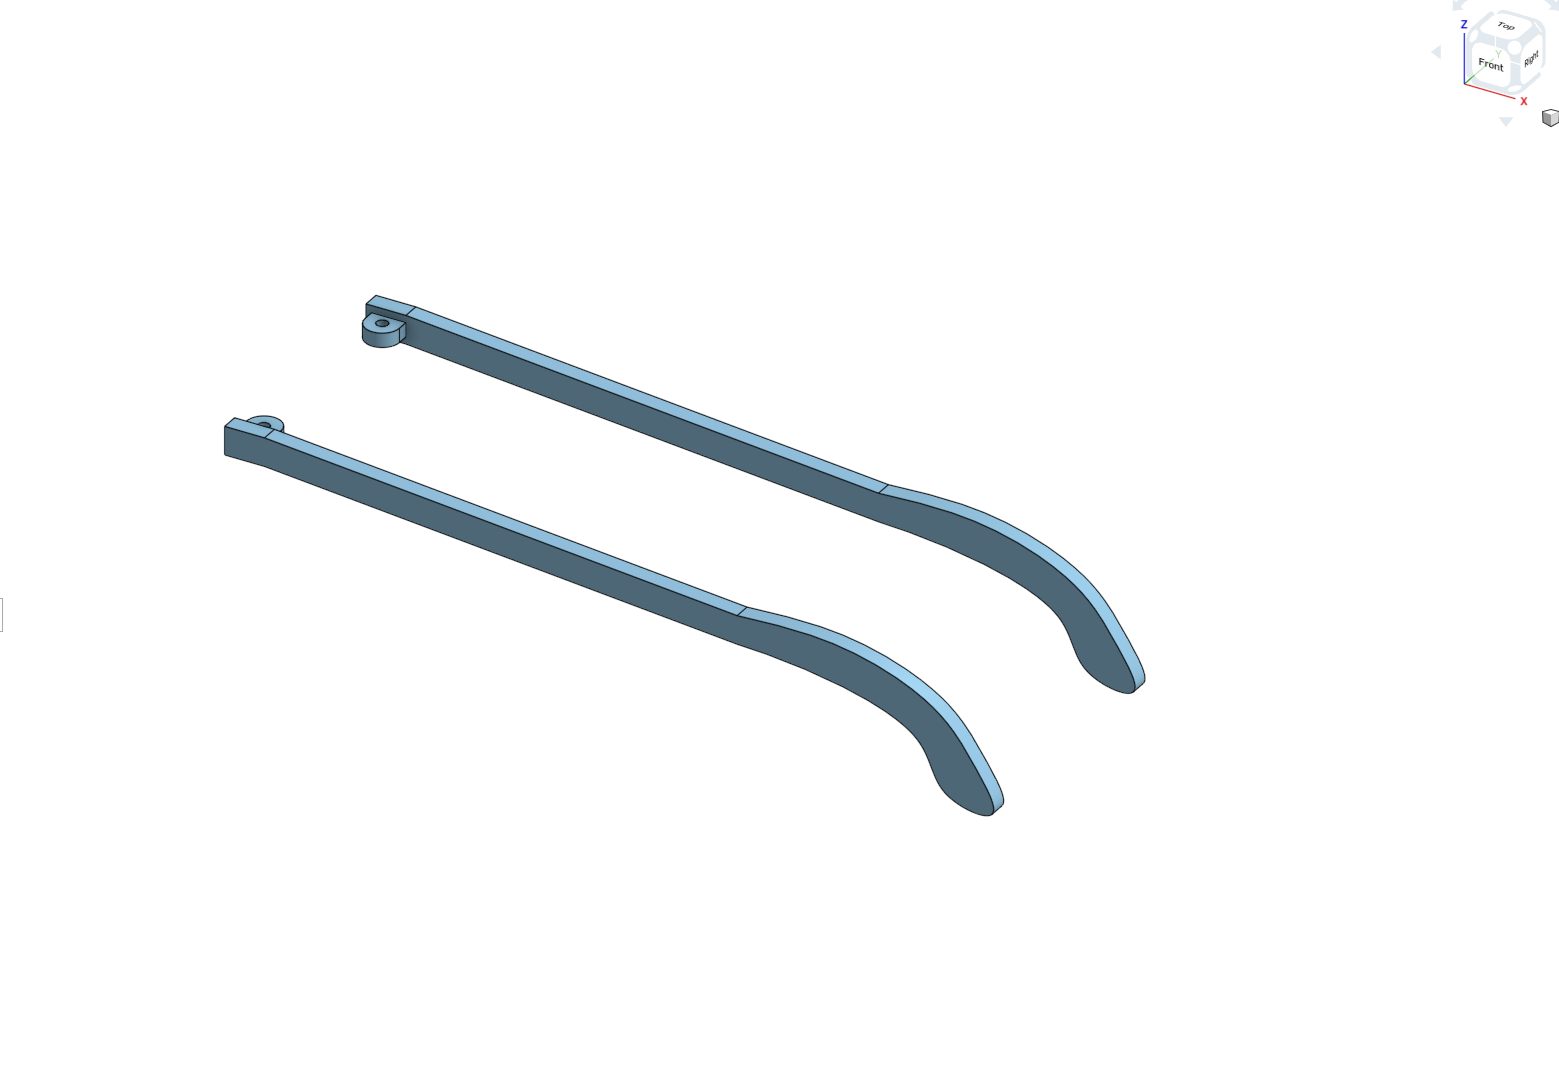 Temple arms designed as separate parts
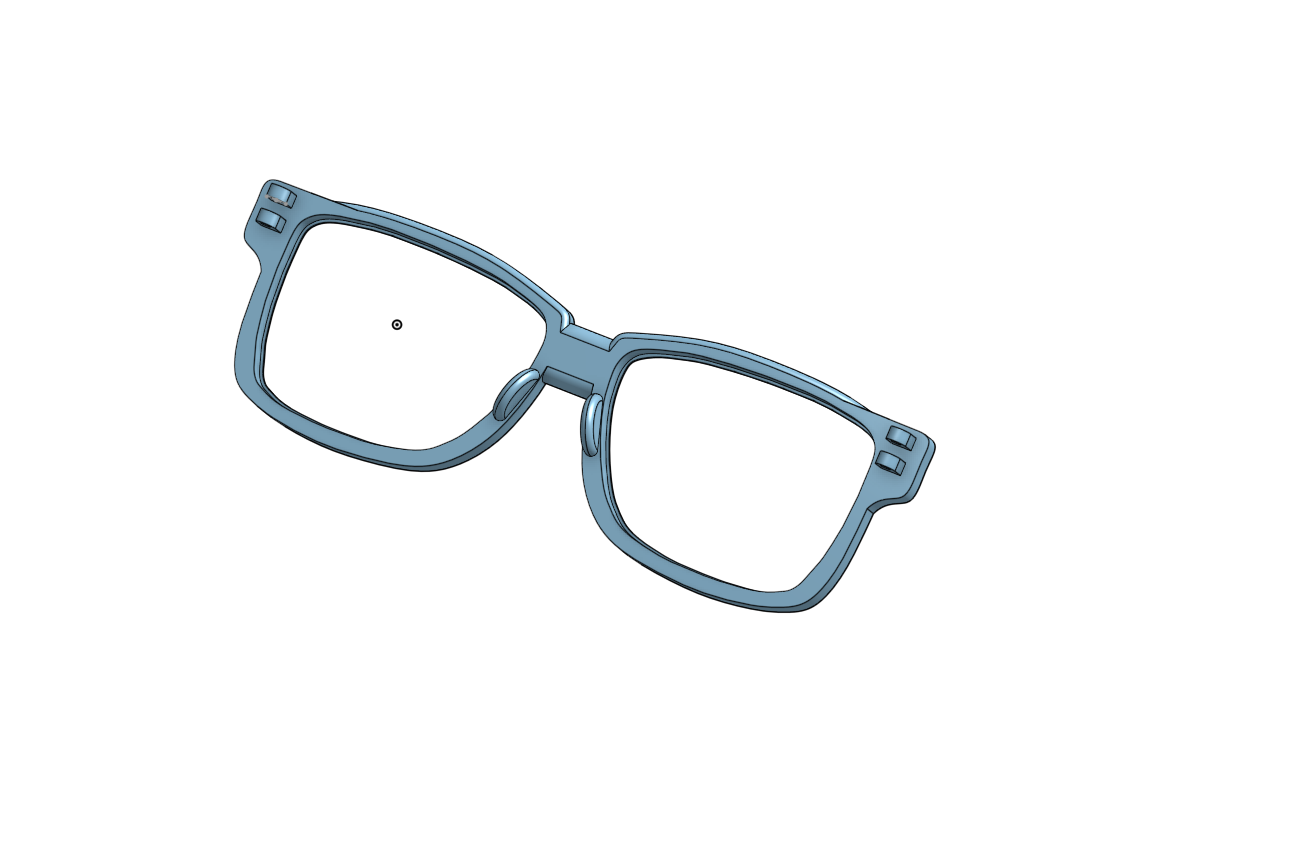
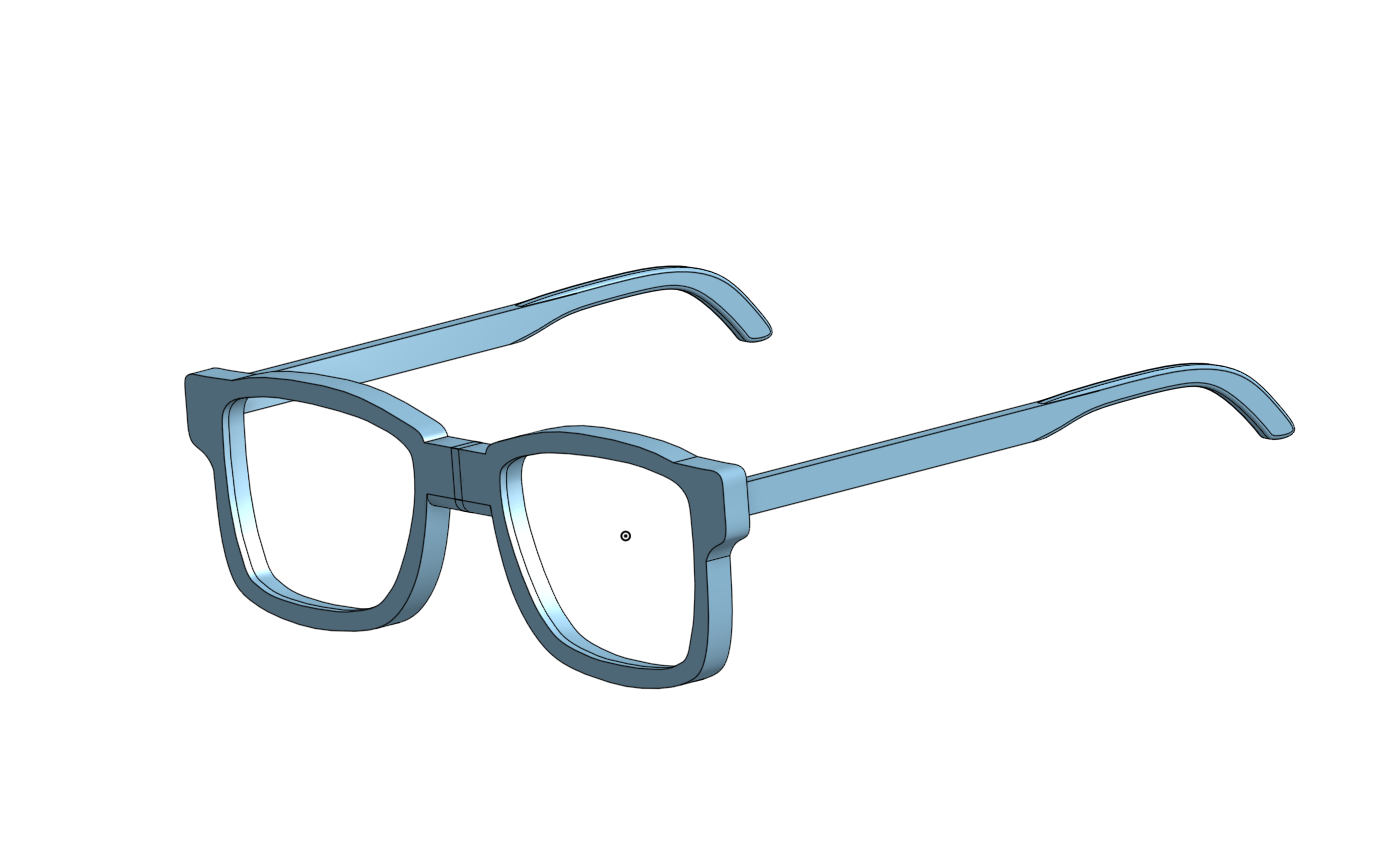 Full assembly
Printing
Not every print went well.
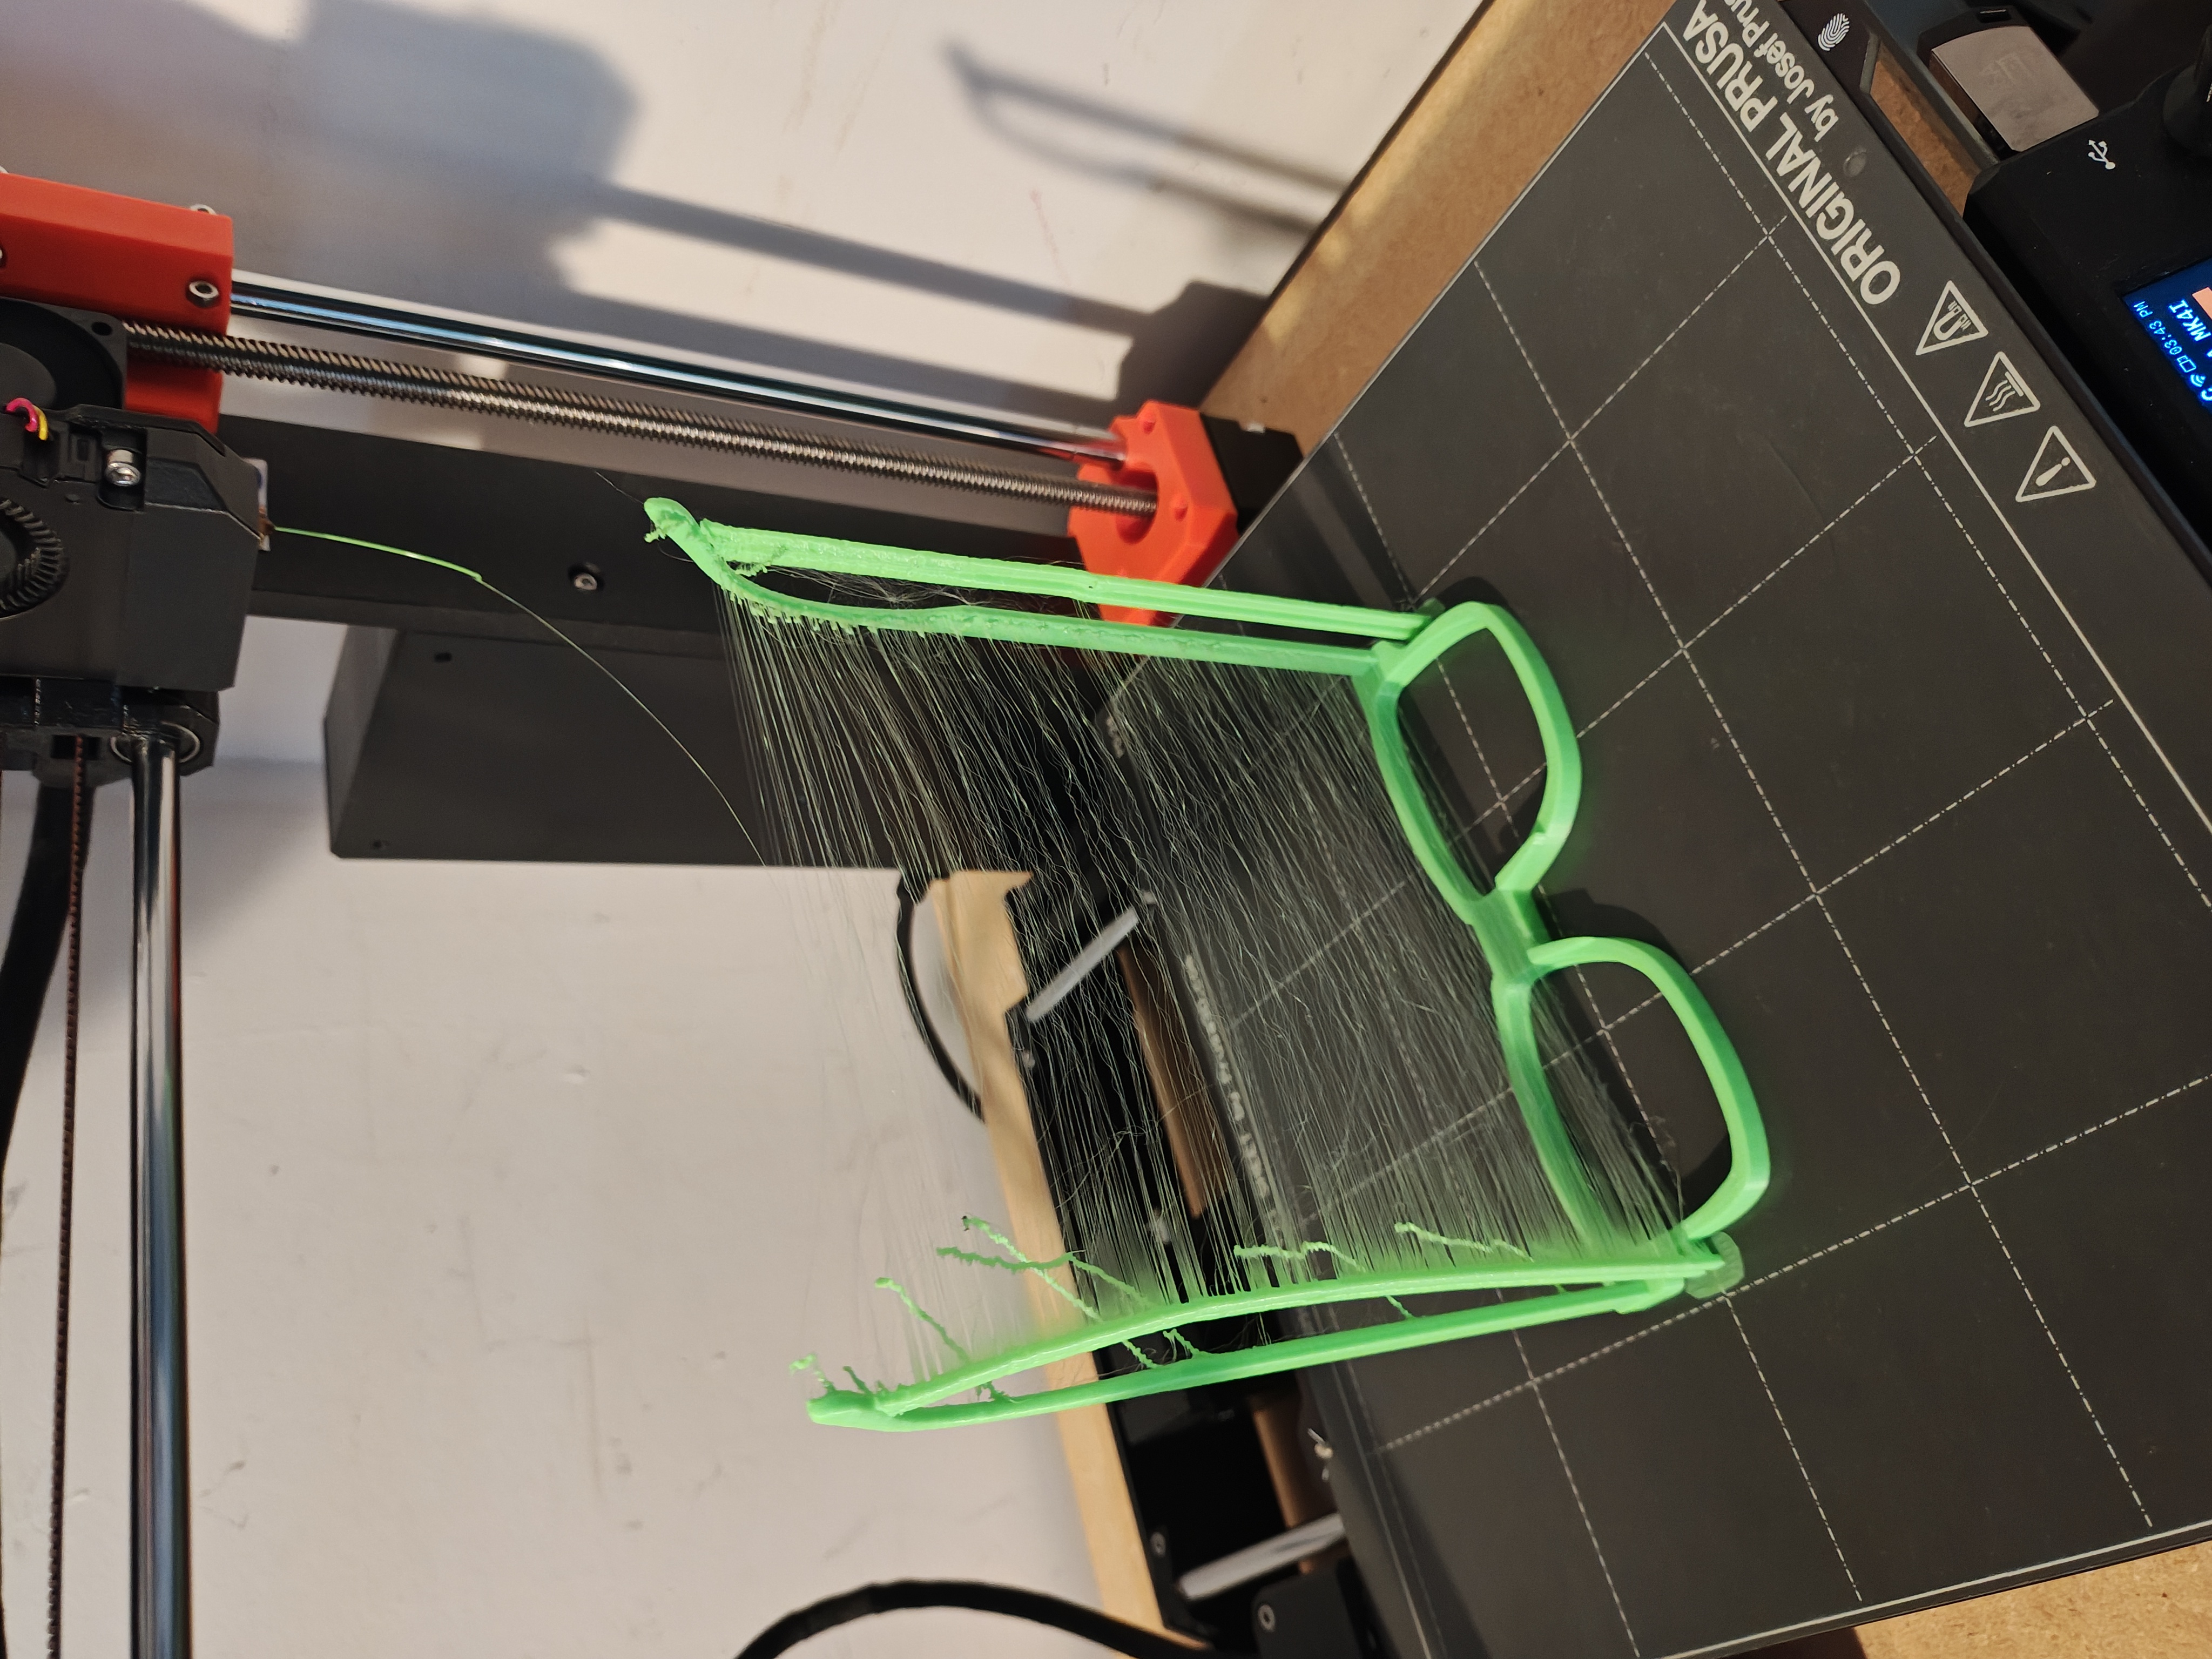 This one did not go well
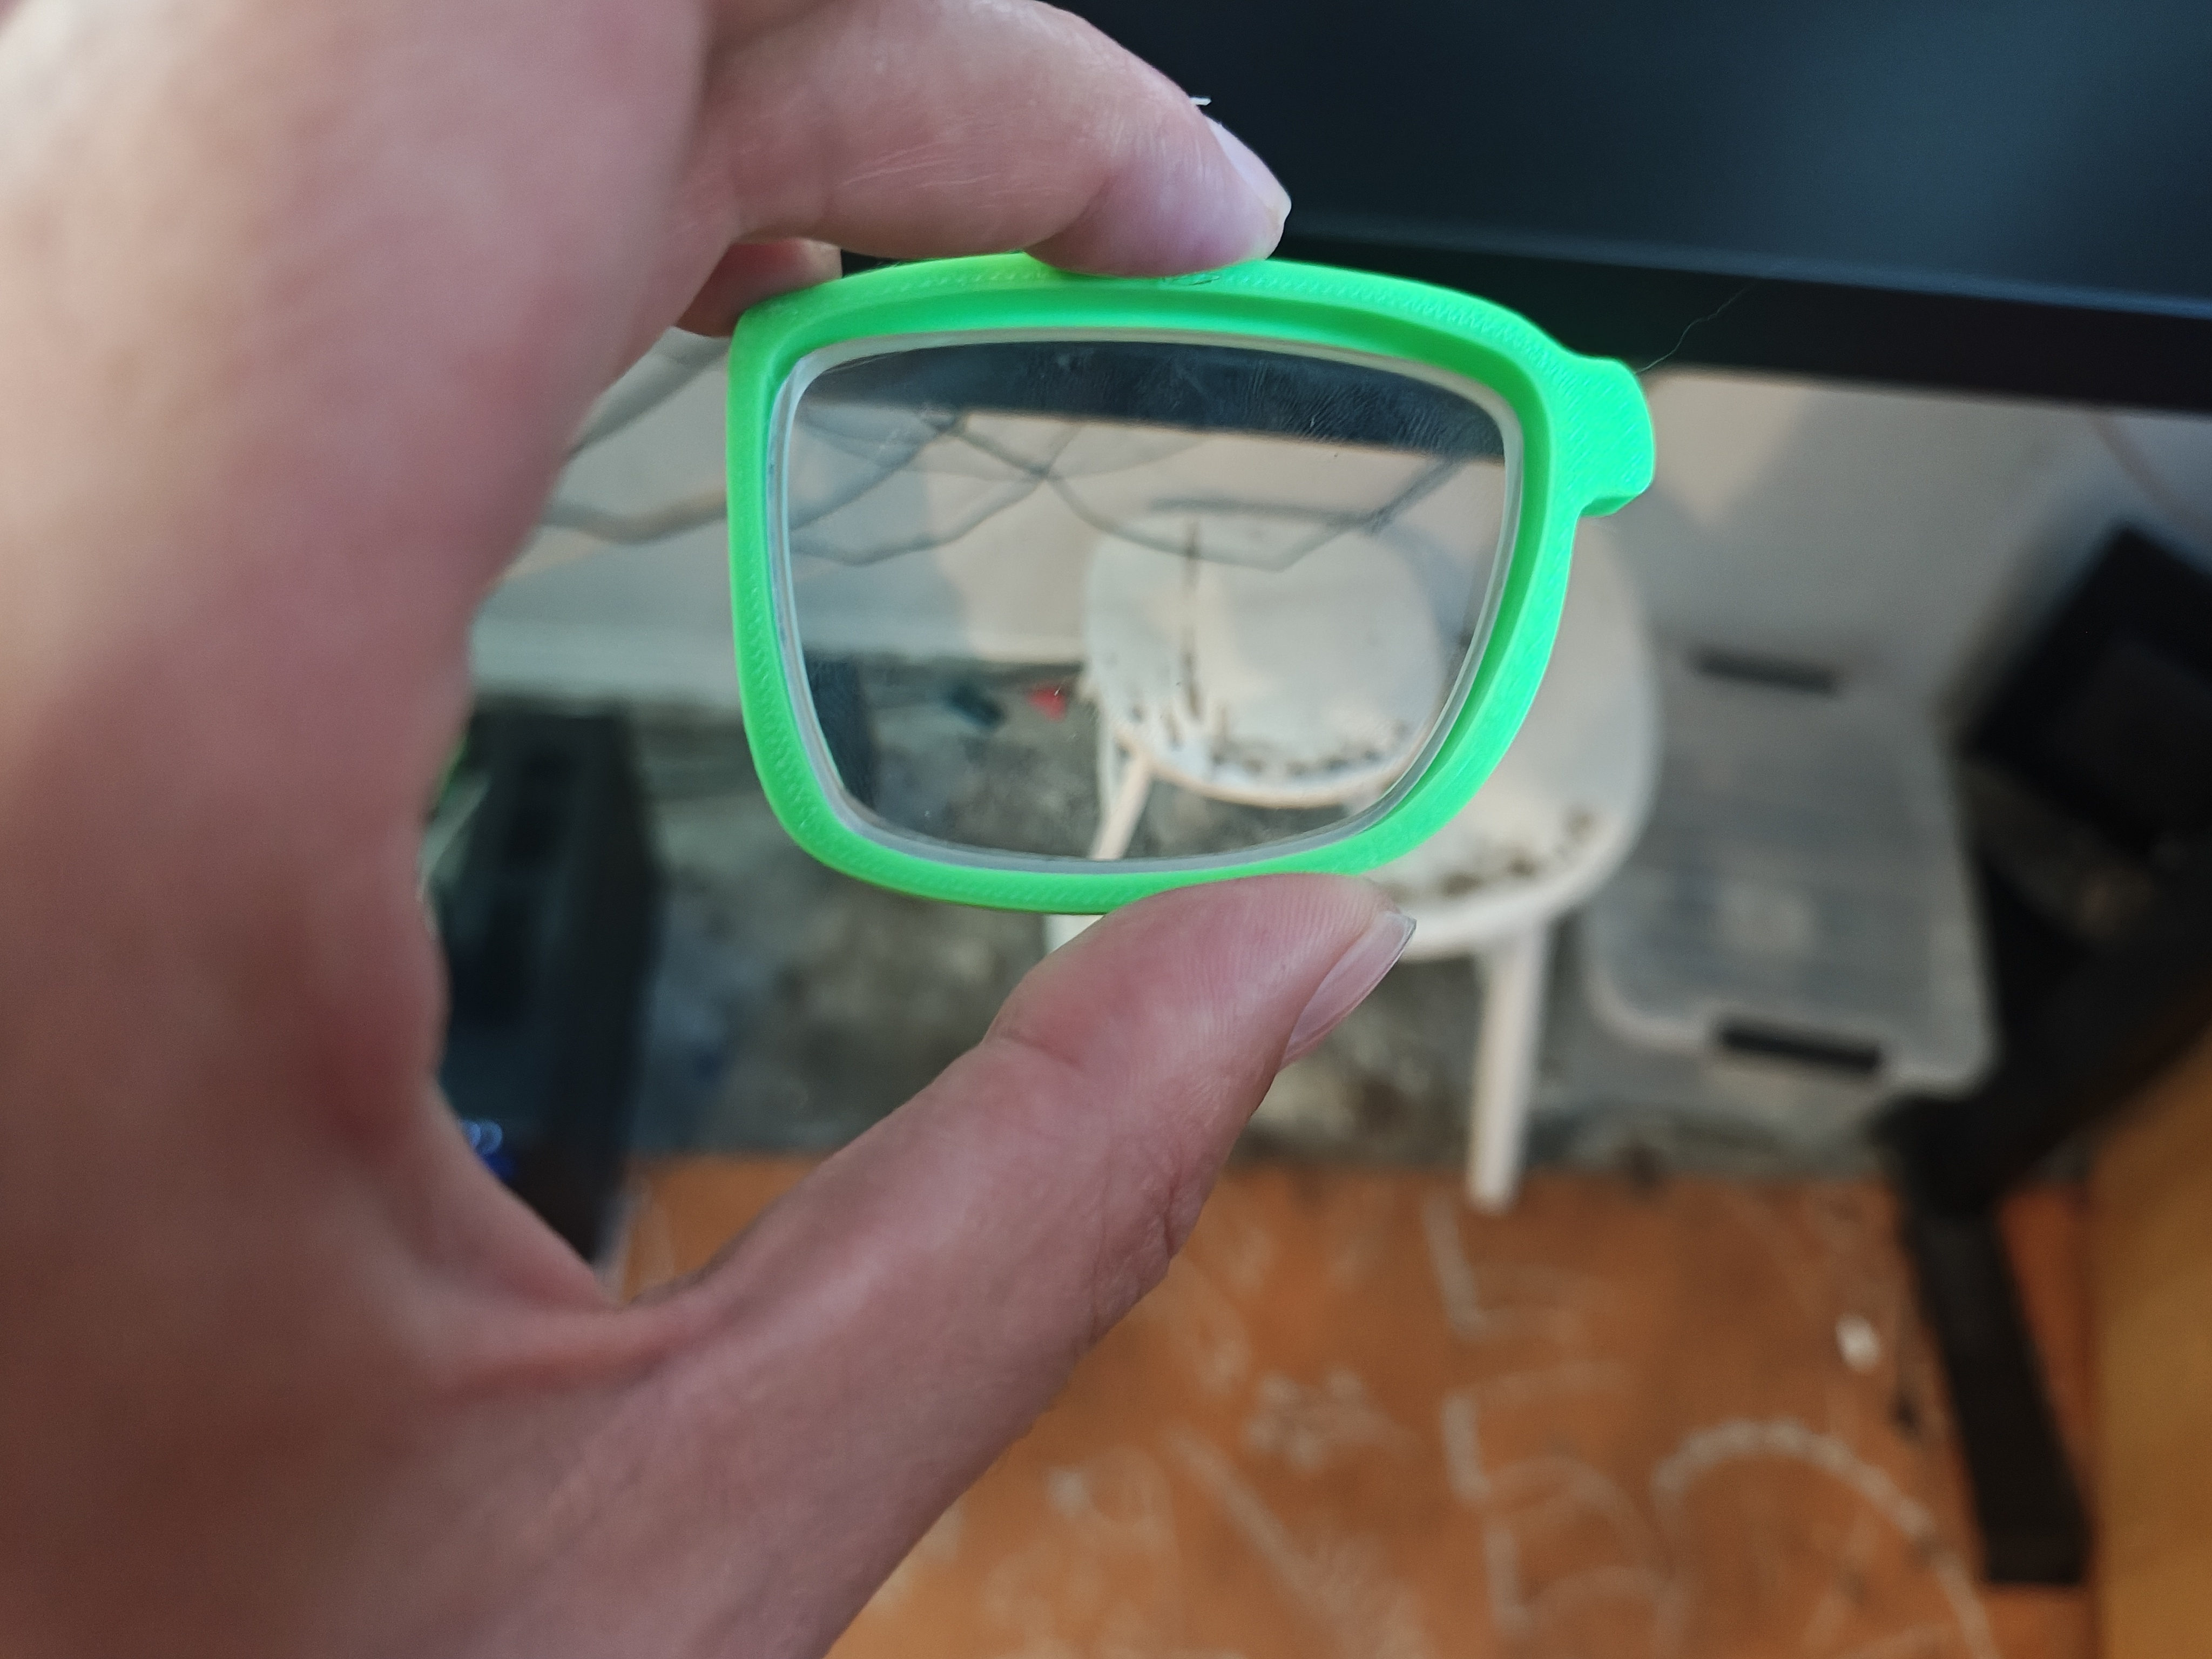 Green prototype with the lens actually fitting
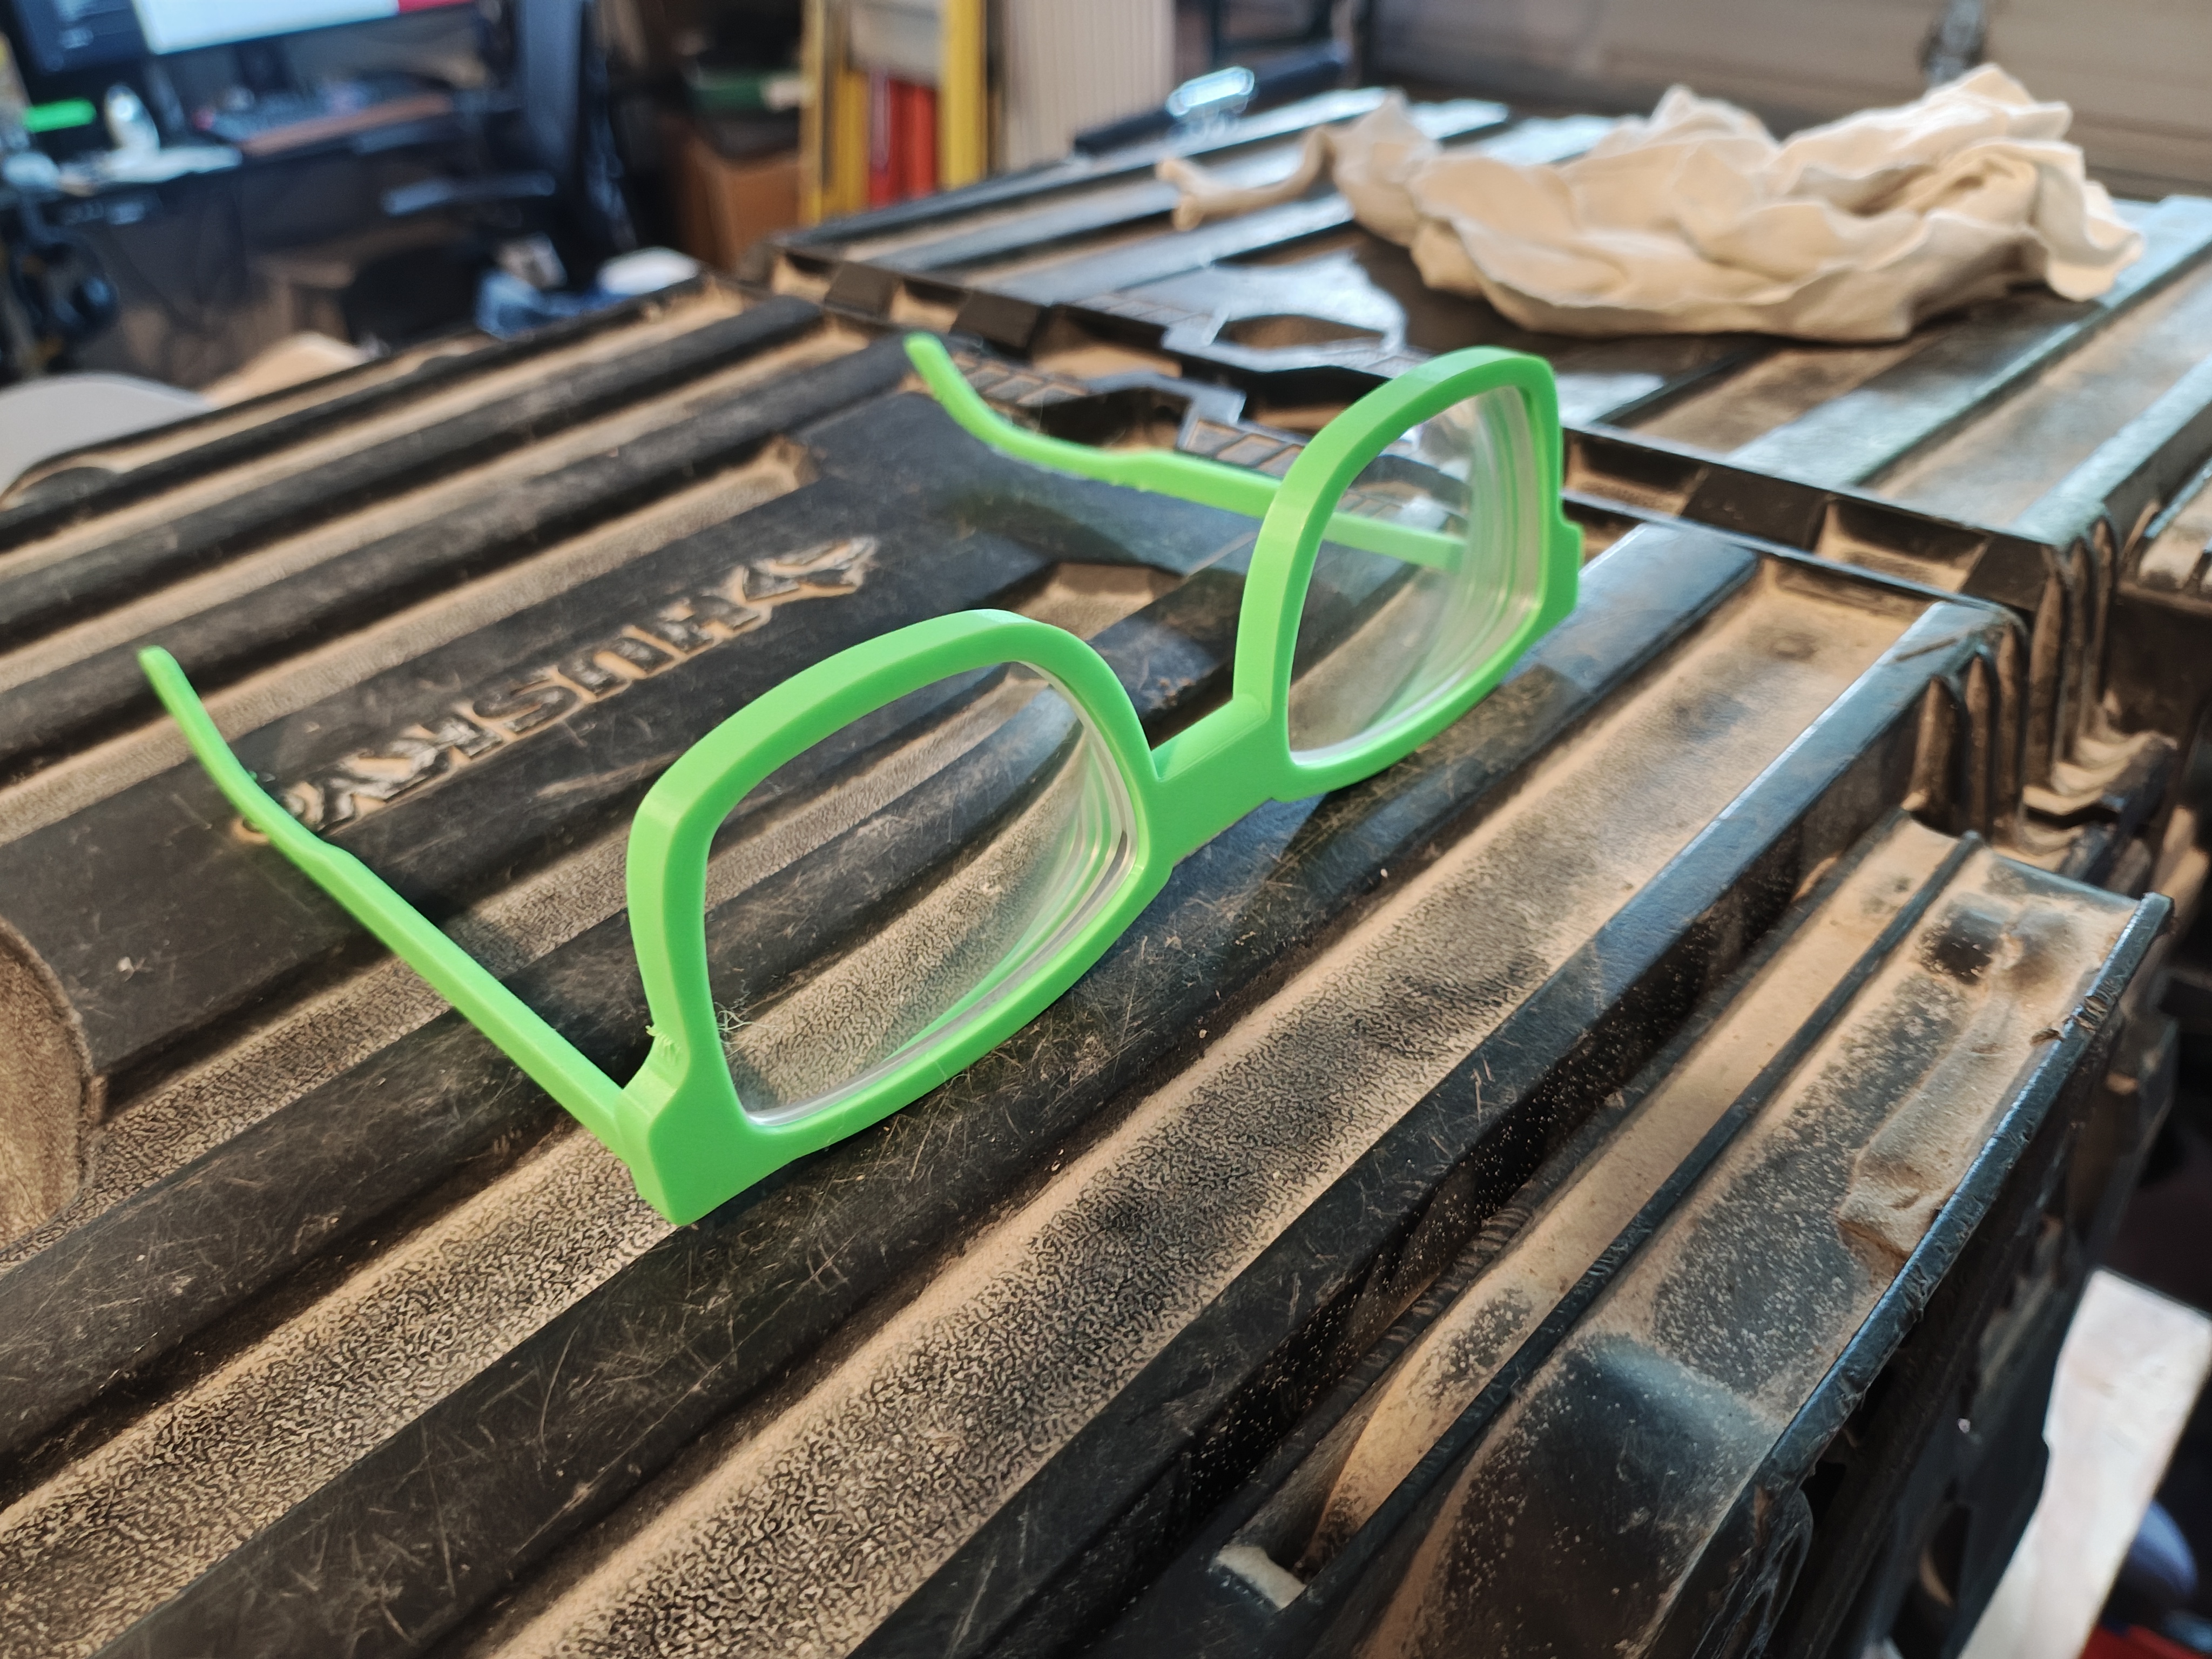 Complete green prototype with temple arms
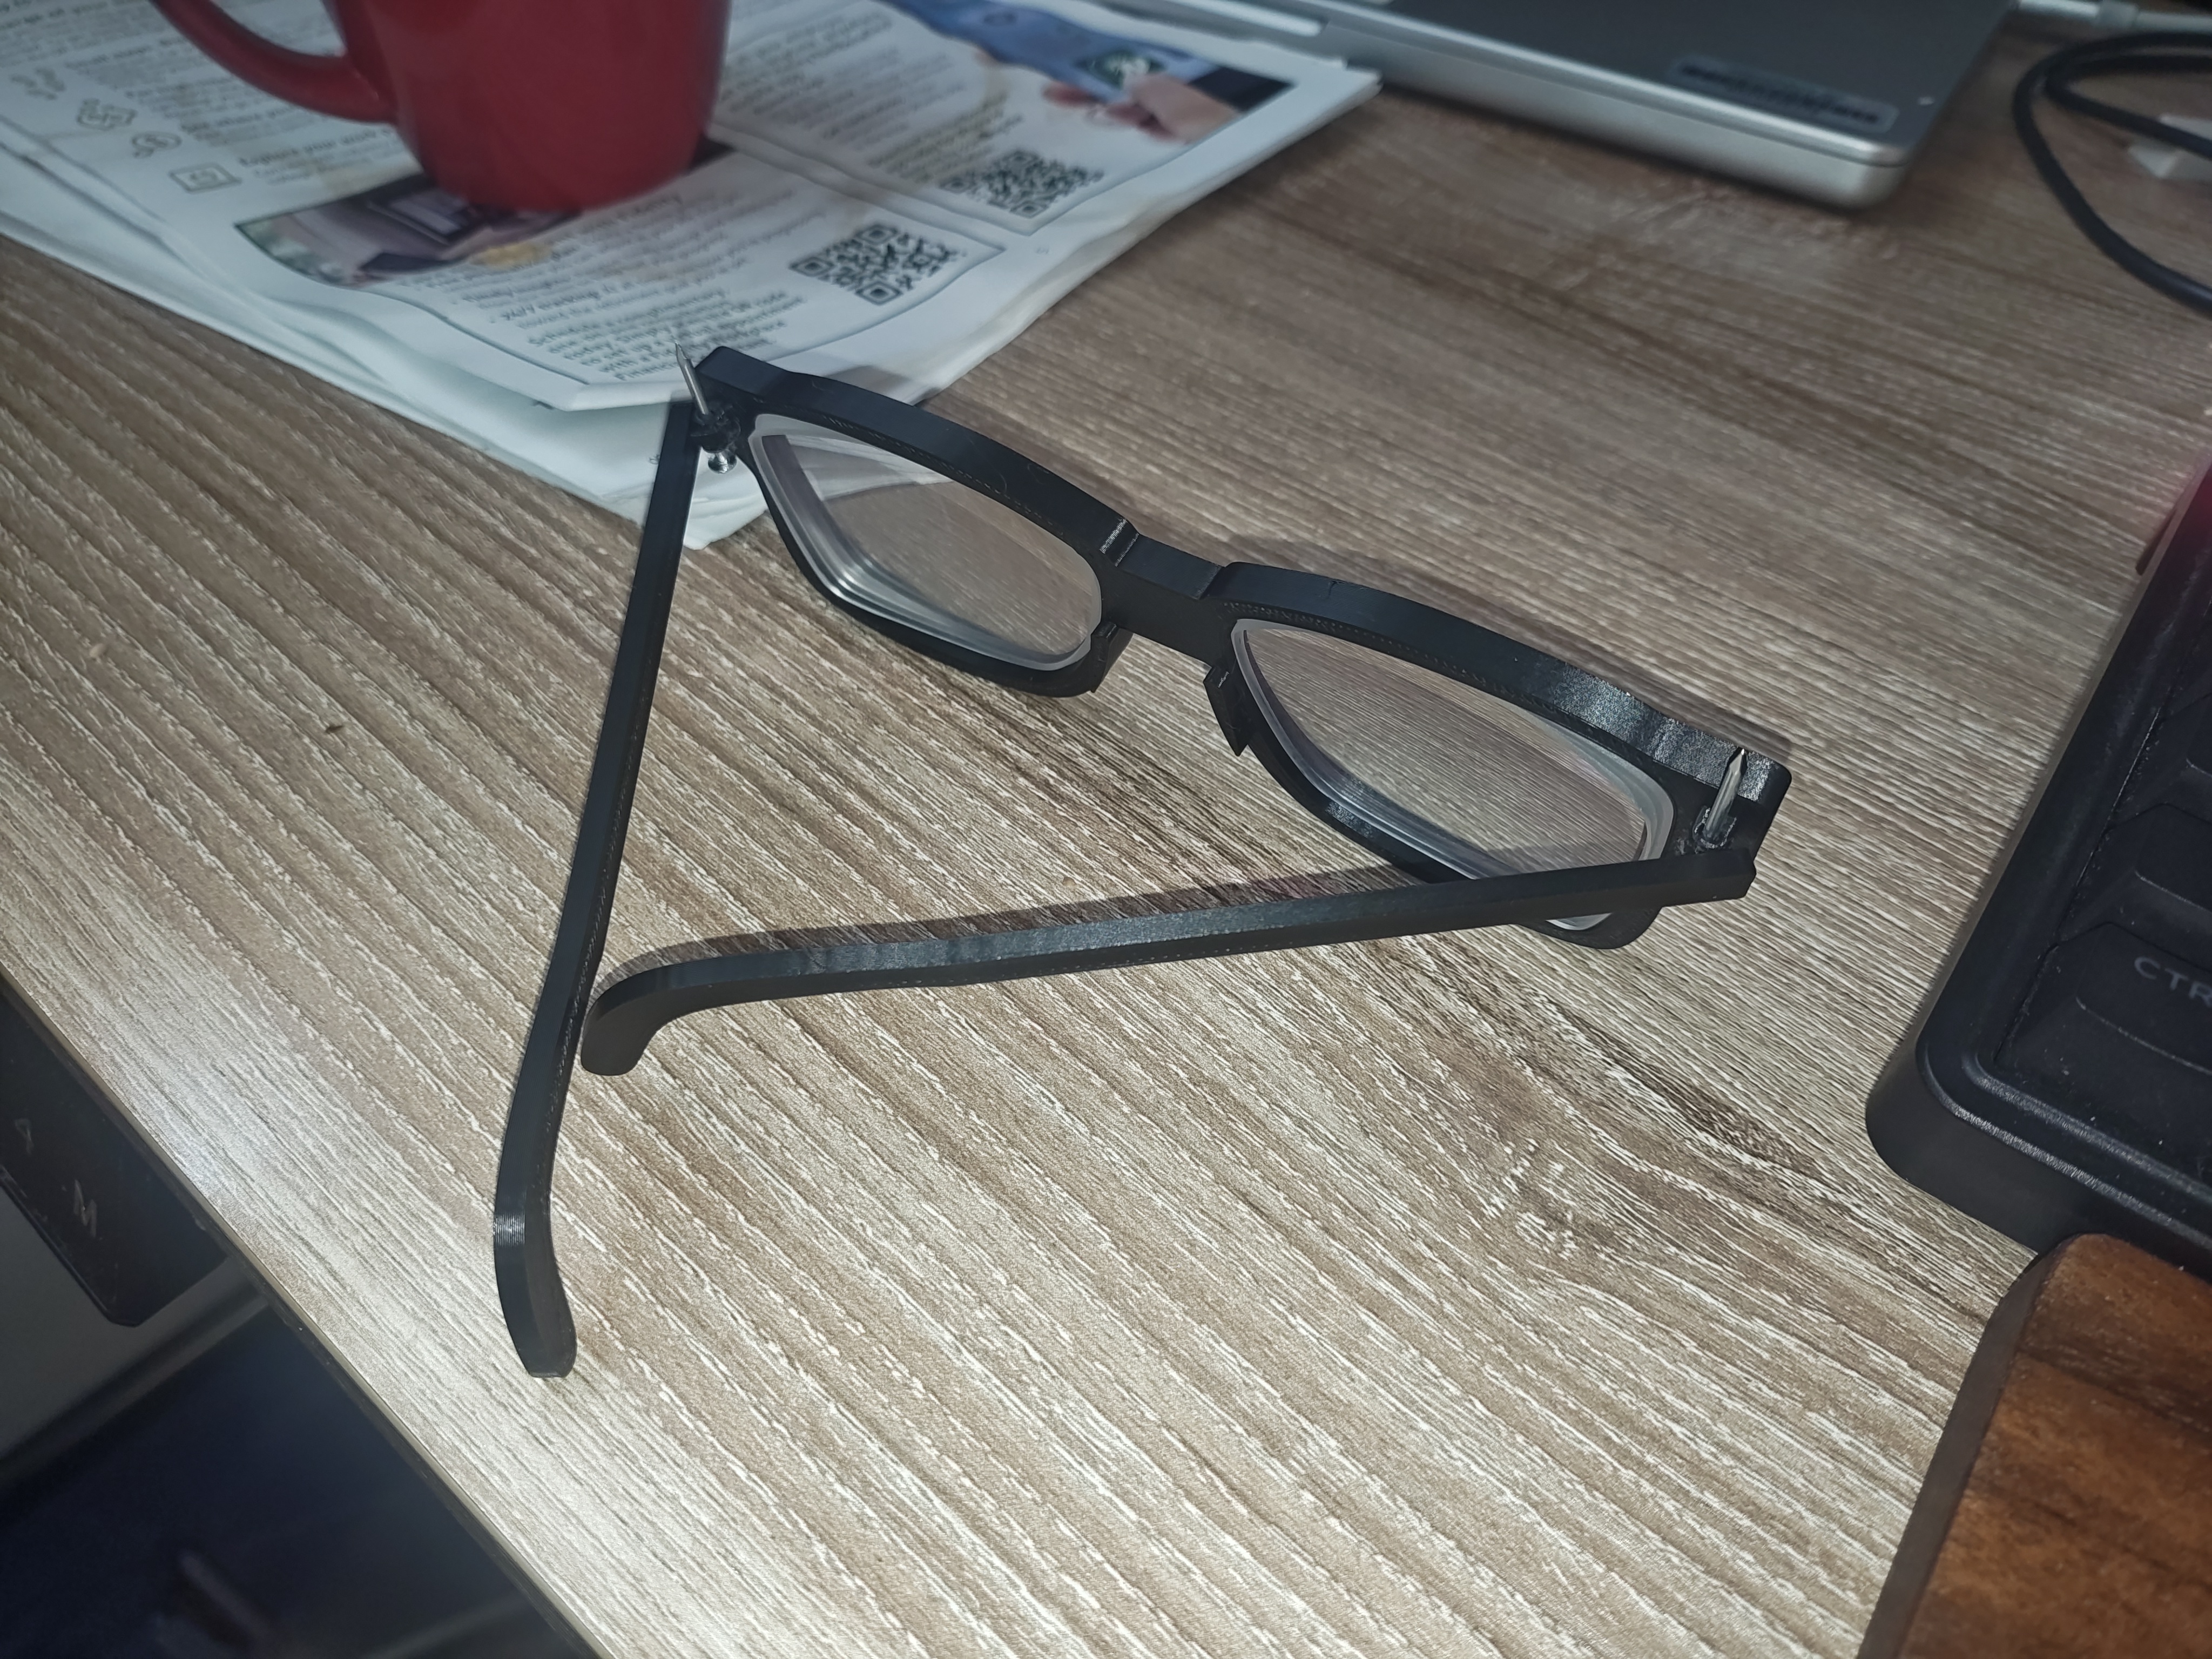 Final frames in black